homepage
  • Your recently viewed scenarios
    • The Attempt to Relieve Peiper
      grumblejones played the scenario
      The Attempt to Relieve Peiper
      Danno played the scenario
      Gavin Take
      toddgrx played the scenario
      Siberian Shockwave
      asloser played the scenario
      Priority Target
      toddgrx played the scenario
      The Bitche Salient
      dmareske played the scenario
  • Not Logged In
  • Home
  • Shop for Scenarios
  • Article List
  • Reviews
  • Advanced Search
  • Game Search
  • Maps
  • Scenario Map
  • Games Wanted
  • Tournaments
  • Publications
  • Scenario Picker
  • Reports
    • Balance
    • Statistics
  • Contact
  • Events
  • Scenario Lists
  • Information
    • REST API
    • Privacy policy
    • Terms and Conditions
  • Login/Register
    • Login
    • Register
Seizing the Sittang Bridge CBI (id:#58820)
Sherry Enterprises (Schwerpunkt #10 ID: SP118)   [next]   [previous]
Toungoo, Burma 1942-03-29 (11 others)
28: Ambush! (ASL 4 - Partisan!)
69: Today We Attack (ASL 9 - Gung Ho!)
PBP 15: The Road to Mandalay (Paddington Bears '97 Pack)
MP17: Bagging Burcorps (Melee Pack III)
BFP-45: BIA's First Battle (BFP 3: Blood and Jungle)
FT164: Guts Are Not Enough (From The Cellar Pack # 6)
PBP 15: The Road to Mandalay (Aussie `97 Pack)
69: Today We Attack (ASL 13 - Rising Sun)
28: Ambush! (ASL 12 - Armies of Oblivion (2nd Edition))
69: Today We Attack (ASL 13 - Rising Sun (2nd Edition))
AP212: Independence Delayed (ASL Action Pack #19 Roads to Rangoon)
Designer: Brian Williams
Starter kit scenario?:    Deluxe scenario?:
 
Balance:
JapaneseChinese
50%

Overview:

With new Chinese troops, it was hoped that the Burma Road could be kept open. However, the Japanese had different plans and a different timetable. With the opening of Rangoon after it fell, two new Japanese divisions arrived, the 18th and 56th Divisions. The 56th Division’s recon regiment left Rangoon on 26 March as the 55th Division battled for the important town of Toungoo. Crossing the Sittang below Toungoo, the lead units of the recon regiment approached the bridge from the east. Their attack, coming from an unexpected quarter and with armored cars, surprised the Chinese guarding the bridge.
Attacker: Japanese (56th Reconnaissance Regt, 56th Division)
Defender: Chinese (200th Division, 5th Army)  
5.5 turns
    Players: 2     OBA: None     Night: No
Unit Counts:
Squads: A:7.0 D:10.0
AFVs: A:2
Type 92 x 2

AFVs: D:0
Guns: A:0
Type 89 Heavy Grenade-Launcher x 2
D:0
5cm leGrW 36(g)

Victory Conditions:

Exit VP: Building Control VC: Area Control VC:
Unit Based VC: LOS Style VC: CVP Cap:
Misc Rules: PTO (G.1), LJ (G2.1) Exc: Roads/Bridge exist, Brush: Brush. A: AE (H1.22), D: Lax (A11.8)
Map Board(s):
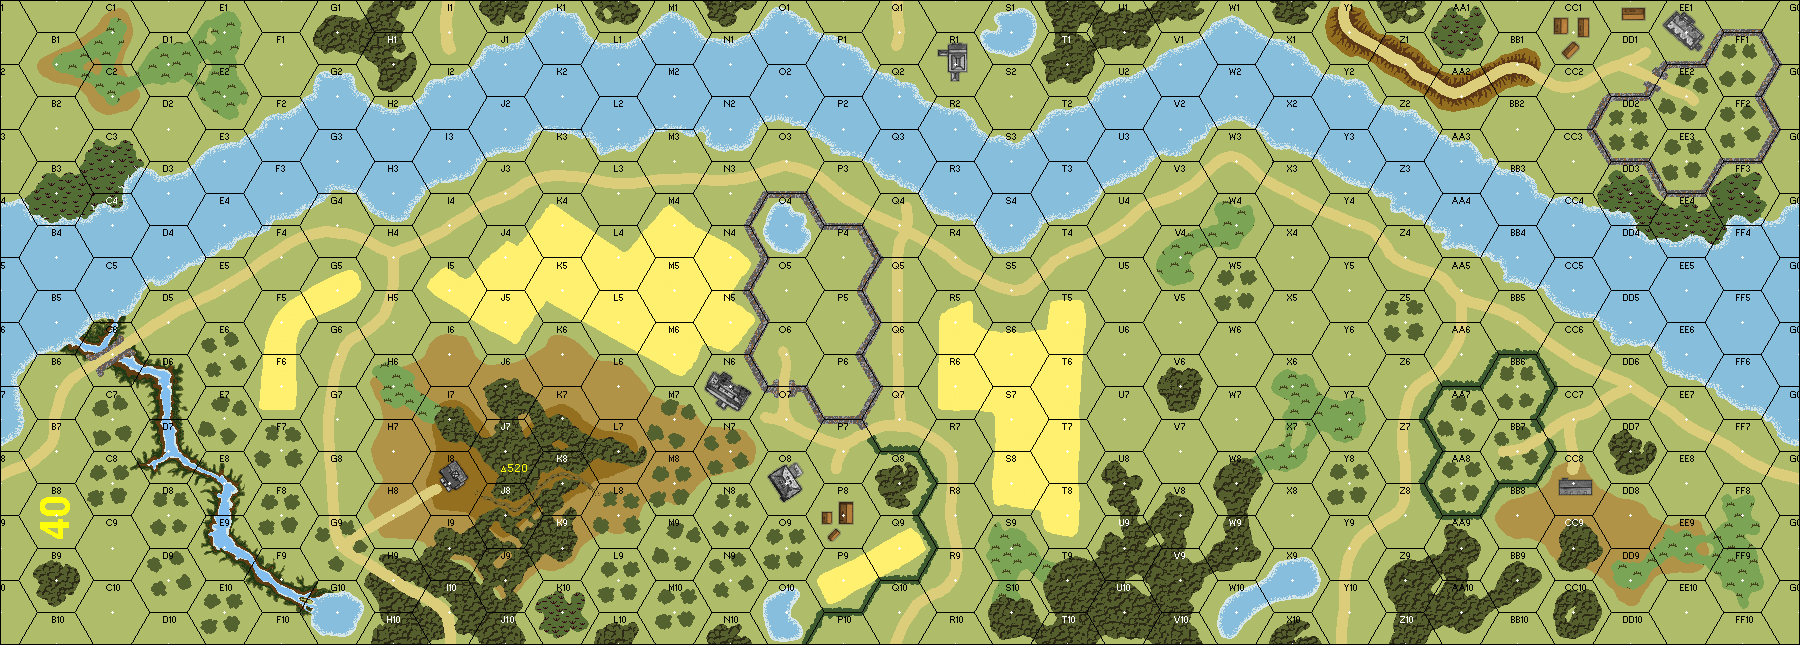
17 40 Show/hide map dependencies
PublicationBoard
ASL 3a - Yanks (2nd Edition)17
ASL 3a - Yanks (2nd Edition)40
ASL 3 - Yanks17
ASL 10 - Croix de Guerre40
Overlays: NONE
Errata (source)
Players wanting to play this game/Request a match:

Scenario info

  • Recent Playings
  • Latest Updates
  • User Files
  • Public Lists
  • Comments
  • Links/References
Last Played:
DateReporterOpponentBal.ResultTimeComments
2026-10-10(A) John Garlic vs Bruce Stevenson Japanese winASLOK 2026
2025-04-27(A) Jon Jaramillo vs Brett Snyder Japanese win4 hrsMy opponent set his Chinese defenders up mostly in the middle of the board, but really favoring the south side of the map. I took the Japanese all in on the north side, using the wall to block LOS. With only two concealed defendering stacks on the board on the south edge, I conducted a banzai charge on turn 2 that got me safely into the middle of the board with no losses. By turn 5, I had established command of the walled off area near the bridge. I mantled both mortars in turn 5 Dfire and in turn 6 prep, I smoked X0, the hex before the bridge entry and another hex with an LMG all with one mortar only. My opponents conceded at that point as I would have simply walked onto the bridge nearly unopposed.
2023-09-22(D) Mark Thompson vs Jonas Bjorkvist (Japanese) Japanese winThe Chinese set-up the bulk of their defense back, with only two sets of two 3-3-7s forward to masquerade as MG stacks and strip concealment: one in the AA8 Hedge enclosure adjacent to center road and one on the DD9 Hill hex. Their main defense entrenched in AA5 (9-1/MMG/2x4-4-7 (one Dare Death), BB2 (8-1/LMG/2x3-3-7), and CC3 (8-0/LMG/3-3-7), with the mortar in X0. A successful entrenching attempt in Chinese Player Turn 1 added the second 4-4-7 to the foxhole in AA5. The forward units did a decent job holding up the Japanese infantry in the hedge/hill area and the Chinese did manage to take out both ACs early on (one by LMG, the other via CC), but a crescendo of doom mounted on the Chinese in the form of malf/elim of all MGs by Turn 3, a DC Hero attack in Turn 3 that broke both 4-4-7s guarding the Bridge entrance, and very effective Japanese MTR Smoke rendering ineffective fire by the units entrenched on the far bank. In the Chinese Player Turn 5, the Japanese had 2 half-squads and 2 full squads on Bridge hexes AA4 and AA3, respectively. A ray of hope for the Chinese came in the form of Rallying of all units (and Hero creation) in their CC1 Alamo and a MTR CH which broke the 2 half-squads on the Bridge, but the Chinese counterattack (including a Beserk Dare Death/9-1 combo) fell just short, succumbing to defensive fire/Resid in AA2. The hapless 9-1 and Hero who made into Melee went down in H-t-H CC, with some small satisfaction of taking a few Japanese with them. The Japanese smoke and DC Hero capability and Chinese B11 IMHO - and as amply demonstrated in the game - make this IMHO a tough one for the Chinese. Then again, the Chinese might have set up a bit too far back and should have placed at least one blocking unit on the Bridge.
2020-06-24(D) wayne baumber vs Graham Smith Chinese winInteresting scenario, at first glance looks pro Japanese but as the Chinese player I had a plan and blow me it worked. Graham was very unlucky in losing both armoured cars om the penultimate turn, which gave me the chance to flood the bridge with Chinese squads therefore ensuring the win. For the Chinese player skulking and a good fallback defence are the keys to victory. Another plus for me in our games was the death of both Japanese leaders very early on. Enjoyable game
2014-01-06(A) Kevin Killeen vs Ken Young Japanese win
View all or balance report
ActionDate
jgarlic79@gmail.com Added a playing2026-10-21 13:17:45
Hutch Modified the gps location2025-04-30 11:29:10
Hutch Modified the misc. rules2025-04-30 11:27:01
Hutch Modified the Unit Elements2025-04-30 11:25:15
tatumjonj Added a playing2025-04-29 22:03:46
FileDescriptionUserViews
(jap-kmt.png)Imagehoxson12190
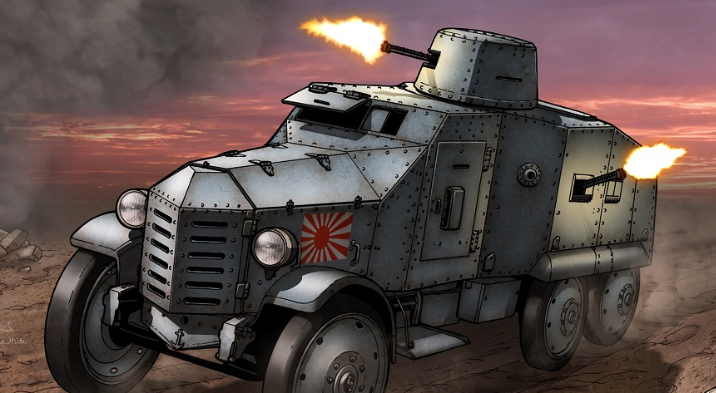
Type 92 Chiyoda Armored Car (type 92 armored car.png)Imagehoxson12144
VASL Map (SP118-VASLMap.png)Map Imagebkemp012340
(sittang bridge N correct.png)Map Imagehoxson12085
DescriptionUploaded by
West Coast Rumble 2008asevenson
TitleAuthorDate
DescriptionUploaded by

Quick Map View

Location

Not Logged in

Images

Type 92 Chiyoda Armored Car
 
Statistics:
Avg Rating: 6.94Votes: 16
Views: 7936
To-Play list count: 0
Estimated Play time: 2.6 hours
Recorded Games: 20
Archive recorded plays:
Japanese10
Chinese10
Drawn:0

ROAR Data: (as of today)
Seizing the Sittang Bridge
[Log in to Confirm or Edit]
[A] Chinese 38
[D] Japanese 53
All Rights Reserved. (c)2022 Dave Ramsey.